Did you know that the Ground Socket Assembly that supports the Sunshine Clothesline, in almost all soils, does not need cement to hold our Sunshine Clothesline upright. The Ground Socket consist of a 2” Schedule 40, PVC tube 20” long and metal “Wings” fastened to it to make an assembly which holds stable in the ground.
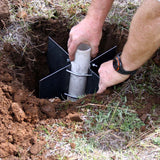
You should assemble your Ground Socket Assembly in this way, position the two Wings on the PVC tube using the 4 special formed bolts and wing-nuts to secure the Wings around the tube. Locate the top of the Wings about 4 inches from the top of the tube. CAUTION!! Do not over tighten the 1/4” wing-nuts as you will indent the tube making it difficult or impossible to get your Sunshine Clothesline into the Ground Socket after assembly.
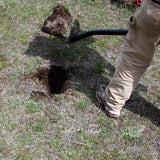
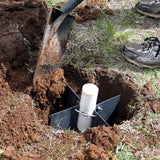
To install your Ground Socket, auger or dig a hole in the ground 6” deeper than the length of the Ground Socket or 26 inches deep. Place 6” of gravel or small stones in the bottom of the hole, this will allow for proper drainage. Be sure to make the top of the hole large enough to accommodate the Wings of the Ground Socket as shown in the photos attached.
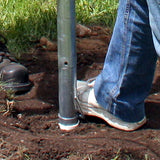
After making sure the Ground Socket is plumb and the top of it is at ground level, pack or tamp the dirt back in the hole and around the Ground Socket firmly.